Canvas에 회전하는 도형 만들기
Table of contents
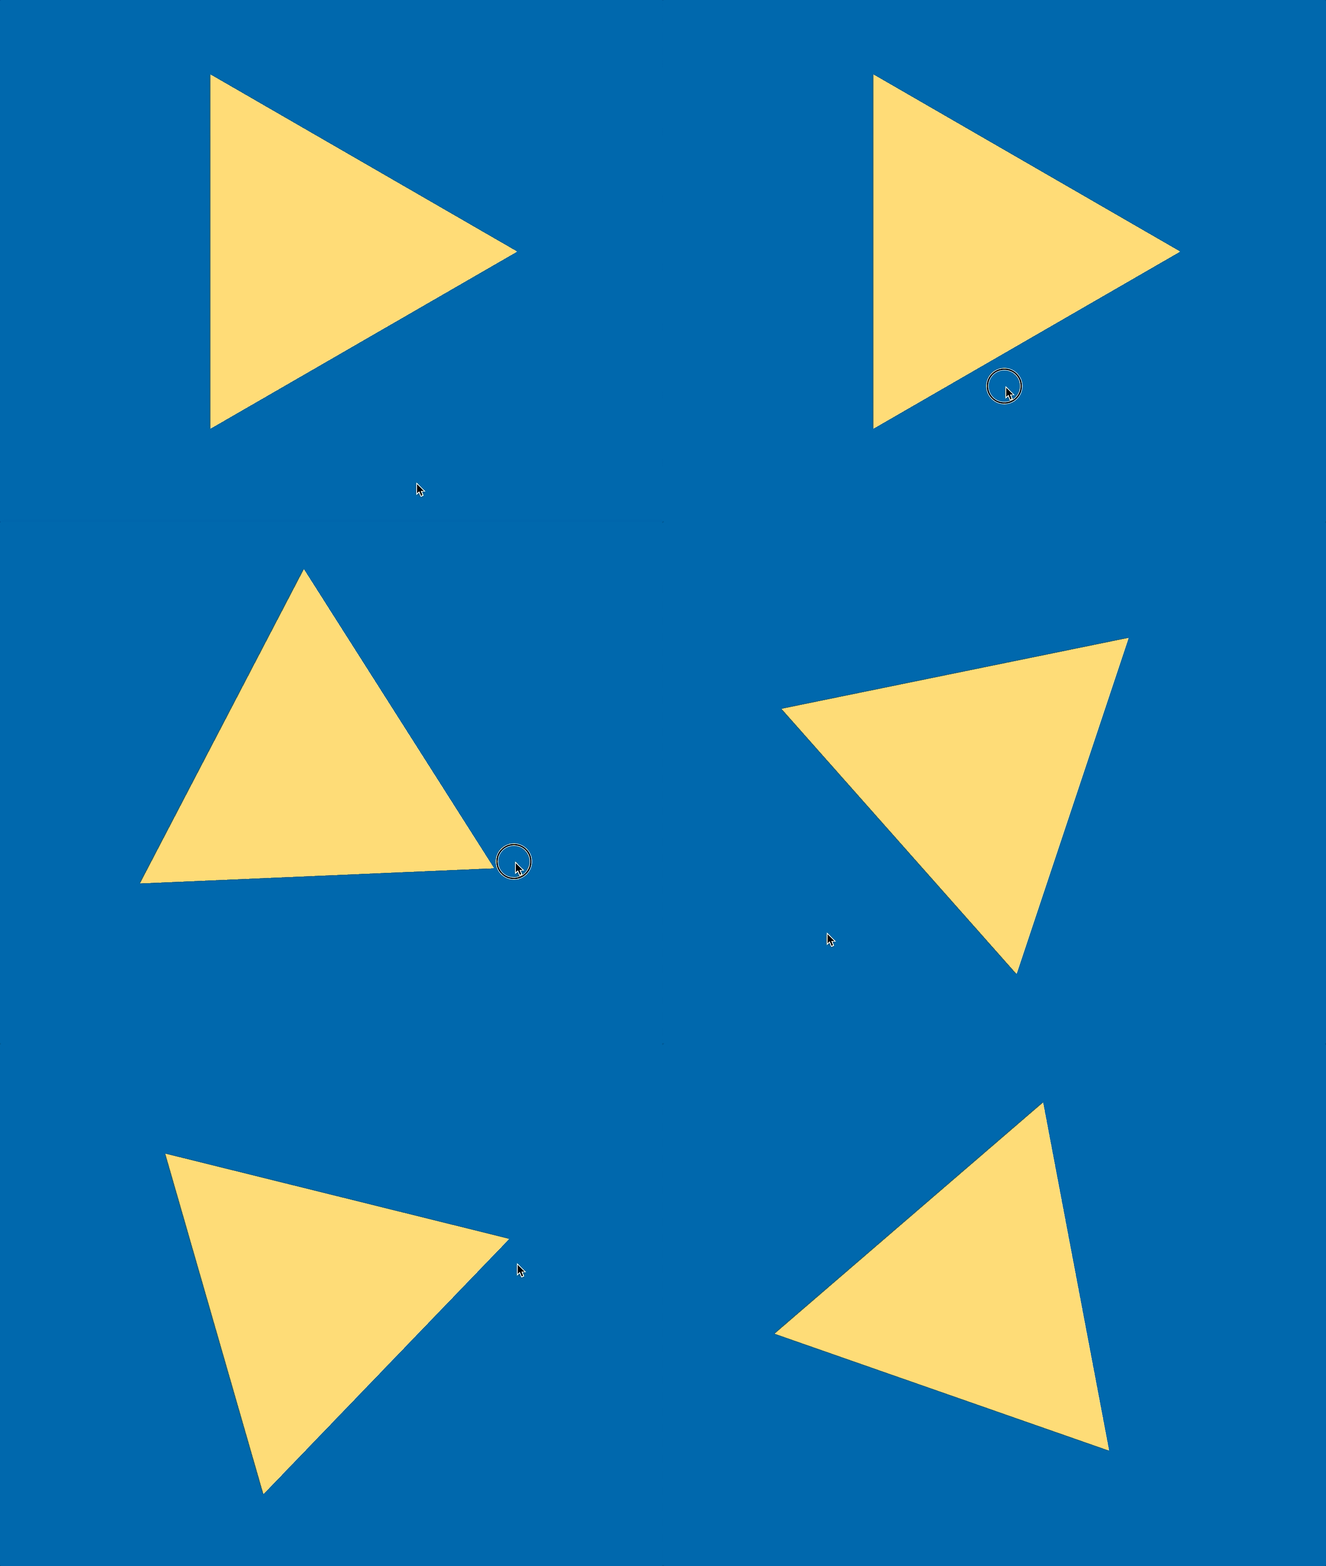
Canvas에 도형을 그리고 그 도형을 회전시키는 애니메이션을 이용해 최종적으로 아래와 같은 애니메이션을 만들 수 있다. 이 애니메이션은 Interactive Developer님이 제작하신 fff project에서 적용된 것으로 Interactive Developer님의 유튜브 강의를 통해 제작했다.

회전하는 도형
손으로 도형을 돌리듯이 마우스가 클릭된 상태에서 원하는 방향으로 움직이면 도형을 회전시킬 수 있다.
도형을 그리는 방법은 여기 참고!

app.js
- pointerdown, pointermove, pointerup 이벤트를 추가해서 클릭했을 때, 클릭해서 이동했을 때, 언클릭했을 때마다 각각의 함수를 만들어준다
onDown⇒ 마우스를 클릭했을 때 isDown 값을 true로 변경해서 onMove 함수가 실행될 수 있도록 만들고, offsetX의 값은 클릭했을 때 X 위치인 clientX 값으로 한다.onMove⇒ isDown 값이 true일 때만 실행되는 함수로 moveX 값을 이동했을 때 다시 바뀐 clientX 값에서 이전 clientX값인 offsetX값을 빼준다. 이를 통해 얼마나 이동했는지 알 수 있다. 그리고 offsetX 값은 현재 clientX값으로 다시 설정한다.onUp⇒ 마우스가 클릭된 상태 손을 떼서 언클릭이 되면 isDown값을 false로 변경해준다.- polygon을 움직일 때 moveX값도 전달해 얼마나 회전시킬지 알려준다
- moveX 값에는 0.92 를 계속 곱해줌으로써 천천히 그 값이 줄어들어 멈추도록 만든다. 만약 이 작업을 하지 않는다면 moveX값이 줄지 않아 영원히 회전하게 된다.
import { Polygon } from "./polygon.js";

class App {
  constructor() {
    this.canvas = document.createElement("canvas");
    document.body.appendChild(this.canvas);
    this.ctx = this.canvas.getContext("2d");

    this.pixelRatio = window.devicePixelRatio > 1 ? 2 : 1;

    window.addEventListener("resize", this.resize.bind(this), false);
    this.resize();

    this.isDown = false;
    this.moveX = 0;
    this.offsetX = 0;

    document.addEventListener("pointerdown", this.onDown.bind(this), false);
    document.addEventListener("pointermove", this.onMove.bind(this), false);
    document.addEventListener("pointerup", this.onUp.bind(this), false);

    window.requestAnimationFrame(this.animate.bind(this));
  }

  resize() {
    this.stageWidth = document.body.clientWidth;
    this.stageHeight = document.body.clientHeight;

    this.canvas.width = this.stageWidth * this.pixelRatio;
    this.canvas.height = this.stageHeight * this.pixelRatio;
    this.ctx.scale(this.pixelRatio, this.pixelRatio);

    this.polygon = new Polygon(
      this.stageWidth / 2,
      this.stageHeight / 2,
      this.stageHeight / 3,
      3
    );
  }

  animate() {
    window.requestAnimationFrame(this.animate.bind(this));

    this.ctx.clearRect(0, 0, this.stageWidth, this.stageHeight);

    this.moveX *= 0.92;

    this.polygon.animate(this.ctx, this.moveX);
  }

  onDown(e) {
    this.isDown = true;
    this.moveX = 0;
    this.offsetX = e.clientX;
  }

  onMove(e) {
    if (this.isDown) {
      this.moveX = e.clientX - this.offsetX;
      this.offsetX = e.clientX;
    }
  }

  onUp(e) {
    this.isDown = false;
  }
}

window.onload = () => {
  new App();
};
polygon.js
전달받은 moveX의 0.008값만큼 곱해서 회전시킨다. 꼭 0.008일 필요는 없는데, 이정도 값이어야 천천히 회전하는 느낌이 난다. 예를 들어 아무것도 곱하지 않으면 너무 많은 각도를 회전해서 너무 빨리 회전하게 된다.
const PI2 = Math.PI * 2;

export class Polygon {
  constructor(x, y, radius, sides) {
    this.x = x;
    this.y = y;
    this.radius = radius;
    this.sides = sides;
    this.rotate = 0;
  }

  animate(ctx, moveX) {
    ctx.save();
    ctx.fillStyle = "#FFD662";
    ctx.beginPath();

    const angle = PI2 / this.sides;

    ctx.translate(this.x, this.y);

    this.rotate -= moveX * 0.008;
    ctx.rotate(this.rotate);

    for (let i = 0; i < this.sides; i++) {
      const x = this.radius * Math.cos(angle * i);
      const y = this.radius * Math.sin(angle * i);

      i == 0 ? ctx.moveTo(x, y) : ctx.lineTo(x, y);
    }

    ctx.fill();
    ctx.closePath();
    ctx.restore();
  }
}
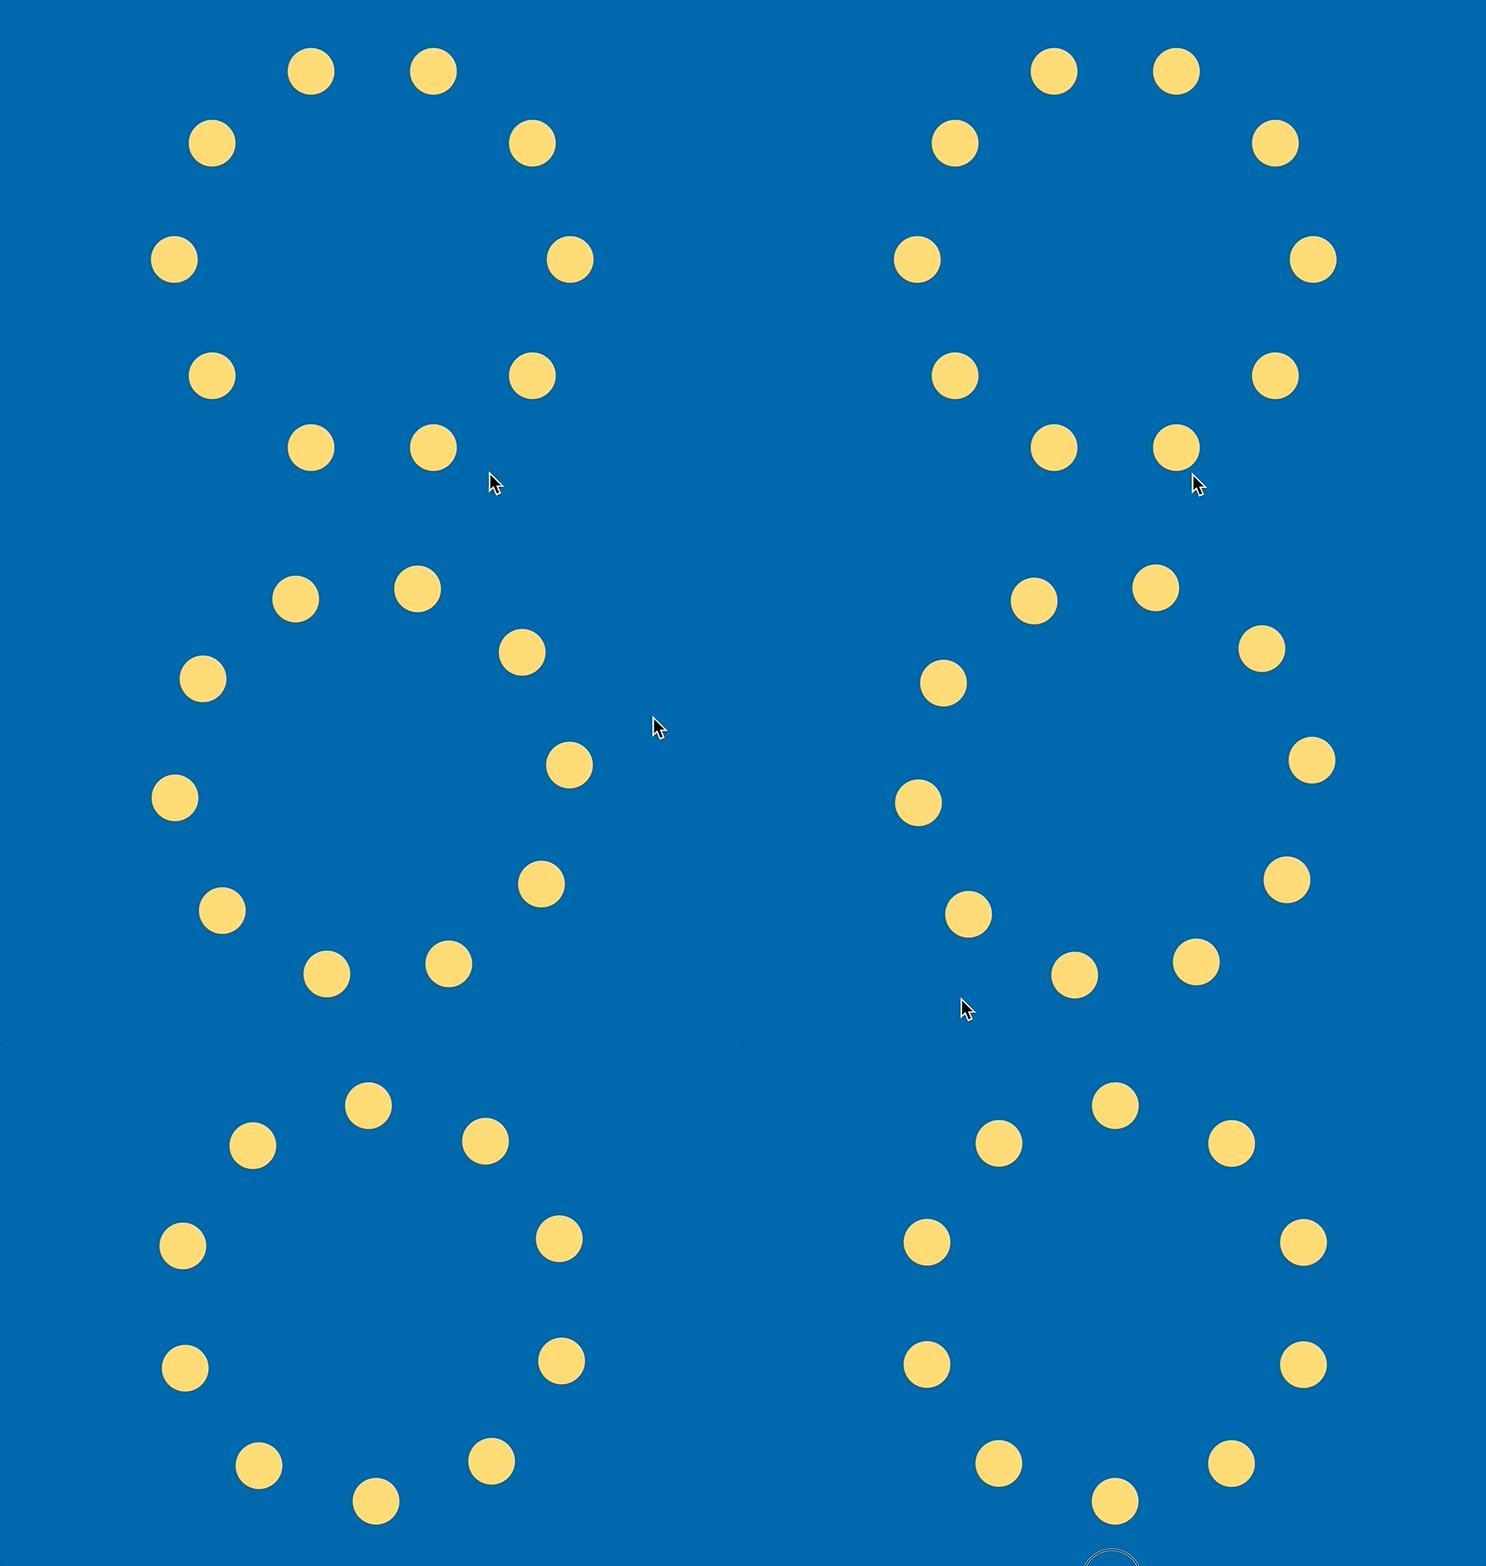
선 대신 점
선으로 이으면 다각형이 되지만, 그 대신 점으로 표현하면 아래처럼 만들 수 있다.

polygon.js
- 선으로 이어서 도형을 만드는 것이 아니라 해당 위치마다 위 그림처럼 원을 만들 수도 있다
- 약간 로딩창 느낌?
const PI2 = Math.PI * 2;

export class Polygon {
  constructor(x, y, radius, sides) {
    this.x = x;
    this.y = y;
    this.radius = radius;
    this.sides = sides;
    this.rotate = 0;
  }

  animate(ctx, moveX) {
    ctx.save();
    ctx.fillStyle = "#FFD662";
    ctx.beginPath();

    const angle = PI2 / this.sides;

    ctx.translate(this.x, this.y);

    this.rotate -= moveX * 0.008;
    ctx.rotate(this.rotate);

    for (let i = 0; i < this.sides; i++) {
      const x = this.radius * Math.cos(angle * i);
      const y = this.radius * Math.sin(angle * i);

      i == 0 ? ctx.moveTo(x, y) : ctx.lineTo(x, y);

      ctx.beginPath();
      ctx.arc(x, y, 30, 0, PI2, false);
      ctx.fill();
    }

    ctx.restore();
  }
}
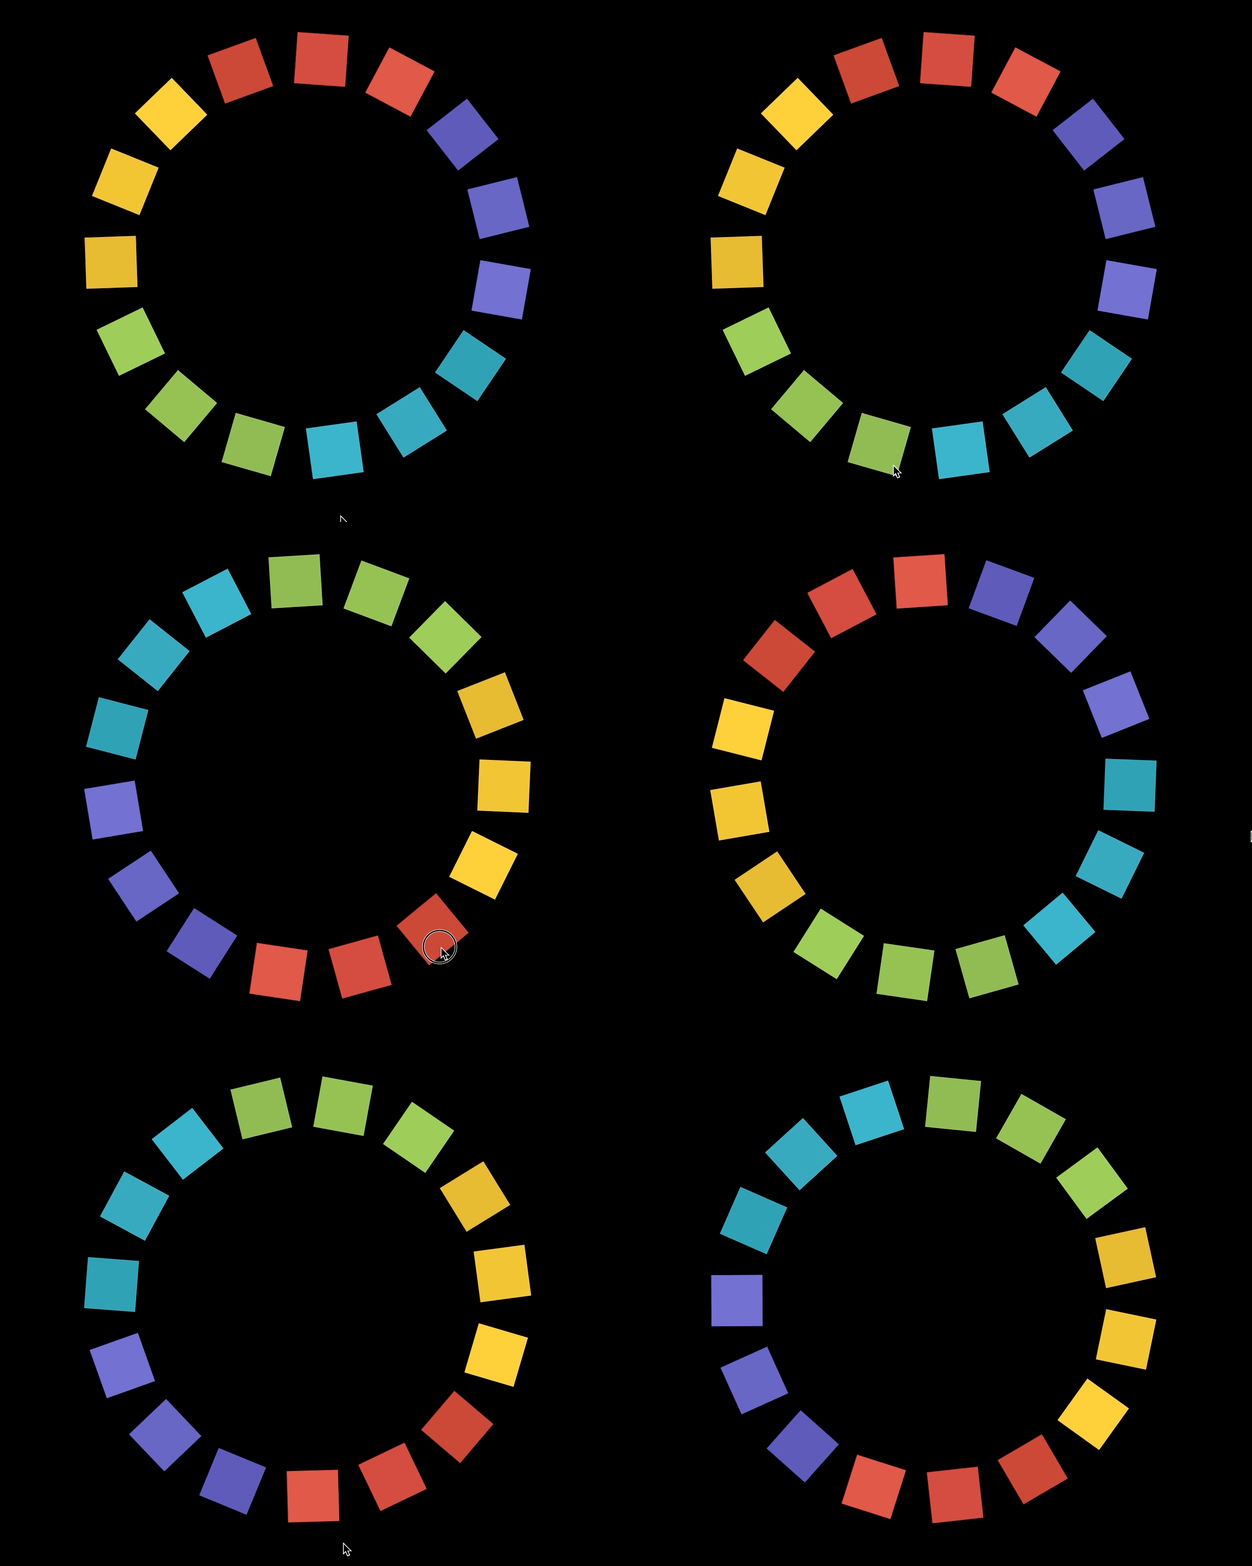
원 대신 사각형 그리기

polygon.js
- 사각형마다 다른 색상을 주기 위해서 COLORS 배열을 만들어준다.
- 먼저 15각형을 하나 만든 다음 15각형의 한 변의 일부를 한 변으로 하는 사각형을 15개 만들어준 것이다.
const PI2 = Math.PI * 2;

const COLORS = [
  "#4b45ab",
  "#554fb8",
  "#605ac7",
  "#2a91a8",
  "#2e9ab2",
  "#32a5bf",
  "#81b144",
  "#85b944",
  "#8fc549",
  "#e0af27",
  "#eeba2a",
  "#fec72e",
  "#bf342d",
  "#ca3931",
  "#d7423a",
];

export class Polygon {
  constructor(x, y, radius, sides) {
    this.x = x;
    this.y = y;
    this.radius = radius;
    this.sides = sides;
    this.rotate = 0;
  }

  animate(ctx, moveX) {
    ctx.save();

    const angle = PI2 / this.sides;
    const angle2 = PI2 / 4;

    ctx.translate(this.x, this.y);

    this.rotate += moveX * 0.008;
    ctx.rotate(this.rotate);

    for (let i = 0; i < this.sides; i++) {
      const x = this.radius * Math.cos(angle * i);
      const y = this.radius * Math.sin(angle * i);

      i == 0 ? ctx.moveTo(x, y) : ctx.lineTo(x, y);

      ctx.save();
      ctx.fillStyle = COLORS[i];
      ctx.translate(x, y);
      ctx.rotate((((360 / this.sides) * i + 45) * Math.PI) / 180);
      ctx.beginPath();
      for (let j = 0; j < 4; j++) {
        const x2 = 80 * Math.cos(angle2 * j);
        const y2 = 80 * Math.sin(angle2 * j);
        j == 0 ? ctx.moveTo(x2, y2) : ctx.lineTo(x2, y2);
      }
      ctx.fill();
      ctx.closePath();
      ctx.restore();
    }

    ctx.restore();
  }
}
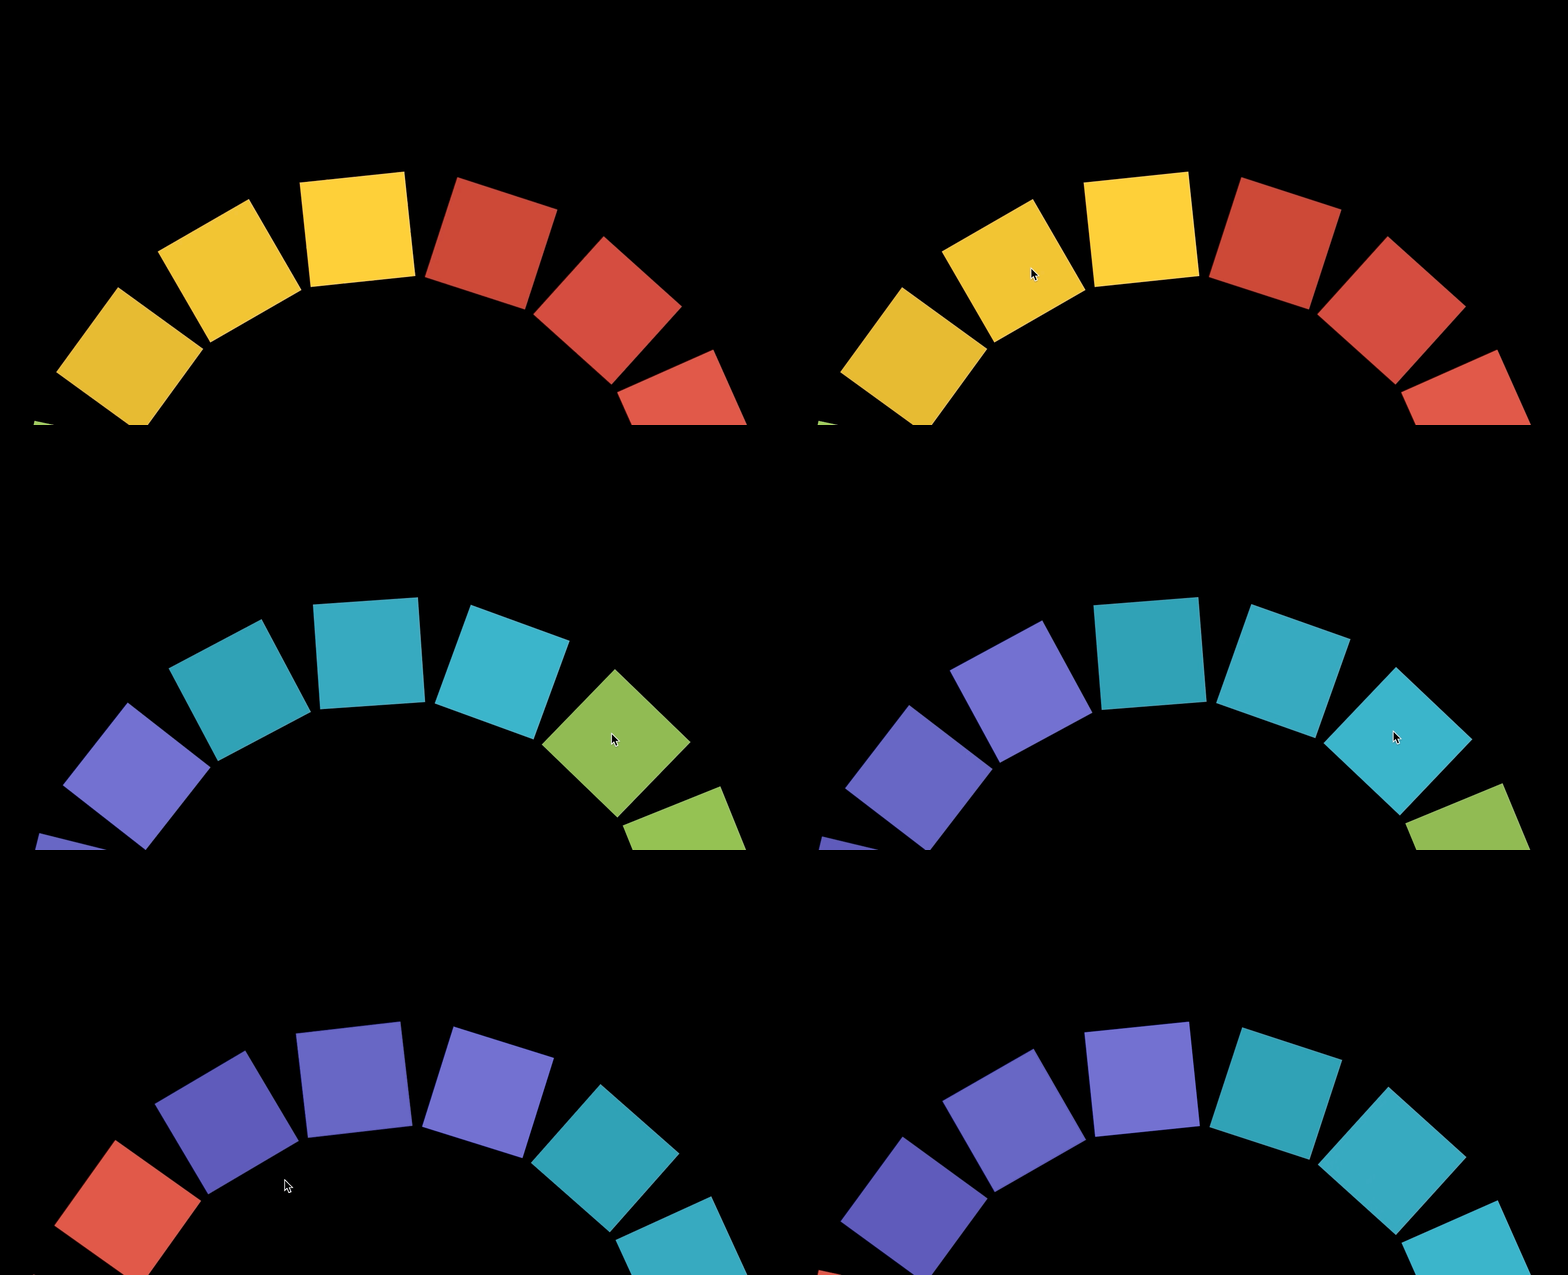
회전하는 도형 애니메이션 최종 버전
위에서 만든 회전하는 도형 애니메이션을 확대해서 일부만 보여주면 아래처럼 만들 수 있다.

polygon.js
더 큰 사각형을 만들기 위해서 x2, y2 좌표값을 구할 때 더 큰 값을 곱해준다.
const PI2 = Math.PI * 2;

const COLORS = [
  "#4b45ab",
  "#554fb8",
  "#605ac7",
  "#2a91a8",
  "#2e9ab2",
  "#32a5bf",
  "#81b144",
  "#85b944",
  "#8fc549",
  "#e0af27",
  "#eeba2a",
  "#fec72e",
  "#bf342d",
  "#ca3931",
  "#d7423a",
];

export class Polygon {
  constructor(x, y, radius, sides) {
    this.x = x;
    this.y = y;
    this.radius = radius;
    this.sides = sides;
    this.rotate = 0;
  }

  animate(ctx, moveX) {
    ctx.save();

    const angle = PI2 / this.sides;
    const angle2 = PI2 / 4;

    ctx.translate(this.x, this.y);

    this.rotate += moveX * 0.008;
    ctx.rotate(this.rotate);

    for (let i = 0; i < this.sides; i++) {
      const x = this.radius * Math.cos(angle * i);
      const y = this.radius * Math.sin(angle * i);

      i == 0 ? ctx.moveTo(x, y) : ctx.lineTo(x, y);

      ctx.save();
      ctx.fillStyle = COLORS[i];
      ctx.translate(x, y);
      ctx.rotate((((360 / this.sides) * i + 45) * Math.PI) / 180);
      ctx.beginPath();
      for (let j = 0; j < 4; j++) {
        const x2 = 160 * Math.cos(angle2 * j);
        const y2 = 160 * Math.sin(angle2 * j);
        j == 0 ? ctx.moveTo(x2, y2) : ctx.lineTo(x2, y2);
      }
      ctx.fill();
      ctx.closePath();
      ctx.restore();
    }
    ctx.restore();
  }
}
app.js
- 처음에는 화면의 중간에서 시작되었는데, 이번에는 도형의 윗 부분만 보여주기 위해서 시작되는 y값을 브라우저의 높이 값에 브라우저 높이 값 / 4 만큼 더 더해준다. (취향에 맞게!)
다각형의 반지름도 처음 만든 것보다 더 크게 만들어주는 것이 좋다
this.polygon = new Polygon(
  this.stageWidth / 2, // x
  this.stageHeight + this.stageHeight / 4, // y
  this.stageHeight / 1.5, // radius
  15 // sides
);
import { Polygon } from "./polygon.js";

class App {
  constructor() {
    this.canvas = document.createElement("canvas");
    document.body.appendChild(this.canvas);
    this.ctx = this.canvas.getContext("2d");

    this.pixelRatio = window.devicePixelRatio > 1 ? 2 : 1;

    window.addEventListener("resize", this.resize.bind(this), false);
    this.resize();

    this.isDown = false;
    this.moveX = 0;
    this.offsetX = 0;

    document.addEventListener("pointerdown", this.onDown.bind(this), false);
    document.addEventListener("pointermove", this.onMove.bind(this), false);
    document.addEventListener("pointerup", this.onUp.bind(this), false);

    window.requestAnimationFrame(this.animate.bind(this));
  }

  resize() {
    this.stageWidth = document.body.clientWidth;
    this.stageHeight = document.body.clientHeight;

    this.canvas.width = this.stageWidth * this.pixelRatio;
    this.canvas.height = this.stageHeight * this.pixelRatio;
    this.ctx.scale(this.pixelRatio, this.pixelRatio);

    this.polygon = new Polygon(
      this.stageWidth / 2,
      this.stageHeight + this.stageHeight / 4,
      this.stageHeight / 1.5,
      15
    );
  }

  animate() {
    window.requestAnimationFrame(this.animate.bind(this));

    this.ctx.clearRect(0, 0, this.stageWidth, this.stageHeight);

    this.moveX *= 0.92;

    this.polygon.animate(this.ctx, this.moveX);
  }

  onDown(e) {
    this.isDown = true;
    this.moveX = 0;
    this.offsetX = e.clientX;
  }

  onMove(e) {
    if (this.isDown) {
      this.moveX = e.clientX - this.offsetX;
      this.offsetX = e.clientX;
    }
  }

  onUp(e) {
    this.isDown = false;
  }
}

window.onload = () => {
  new App();
};
