Canvas에 다각형 그리기
Table of contents
canvas에 다각형을 그리기 위해서는 먼저 다각형의 꼭지점 좌표를 구해야 그릴 수 있다. 다각형의 꼭지점 좌표는 삼각함수를 이용해 구할 수 있다. 다각형의 꼭지점을 구한 다음 모든 꼭지점을 선으로 이어서 색을 칠하면 다각형 완성!
삼각함수로 다각형의 꼭지점 좌표 구하기
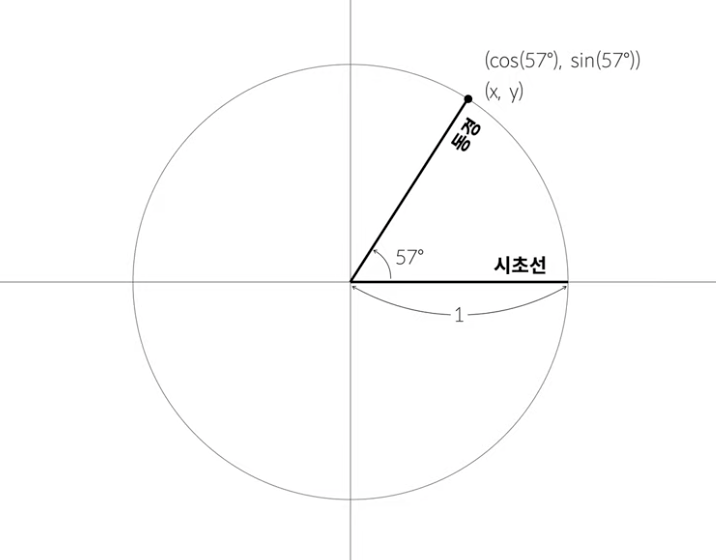
삼각함수를 이용하면 어떤 각도의 점도 알 수 있다. 특정 각도의 x좌표는 cos(코사인) 함수, y좌표는 sin(사인) 함수를 이용해 구할 수 있기 때문이다.
$sinθ = \frac{y}{r}$$cosθ = \frac{x}{r}$
radian 라디안
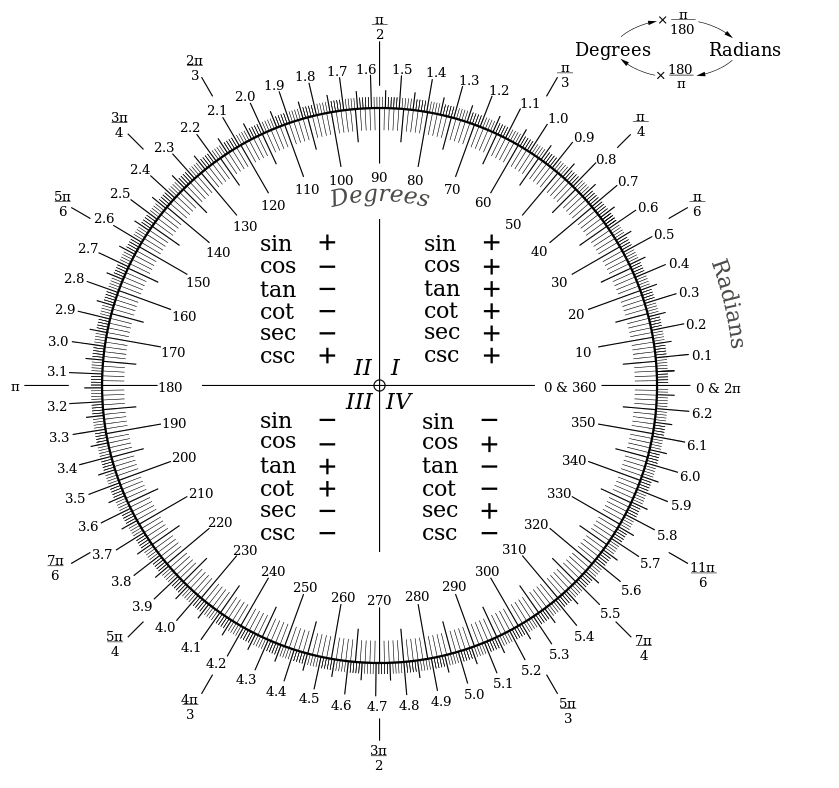
단, 삼각함수에 입력할 수 있는 각도의 값은 degree(도)가 아닌 radian(라디안)을 입력해야 한다. radian은 호의 길이가 반지름과 같게 되는 만큼의 각을 1 radian이라고 한다. 상대적인 각도처럼 보이지만, radian은 절대적인 단위로 1 radian은 약 57.3도 이다.
원은 360도이다. 이를 radian으로 표현하면 아래 그림에서 확인할 수 있듯이 약 6.28 radian이다. 원주율은 약 3.14이므로 원의 총 각도는 원주율*2 radian이라고 할 수 있다.
JavaScript 코드로 확인해보자
반지름이 10인 삼각형의 모든 꼭지점 좌표를 구하기
- 원의 총 각도를 radian으로 구하기 위해 ⇒
Math.PI * 2 - 원의 총 각도를 변의 개수로 나누어주면 꼭지점을 구해야 하는 각도를 알 수 있다
const radius = 10; // 반지름
const sides = 3; // 삼각형
const PI2 = Math.PI * 2;
const angle = PI2 / sides;
console.log(PI2, angle);
// 6.28 2.09
// 6.28 radian = 약 360도, 2.09 radian = 약 120도

for (let i = 0; i < sides; i++) {
  const x = radius * Math.cos(angle * i);
  const y = radius * Math.sin(angle * i);
  console.log(x, y);
}
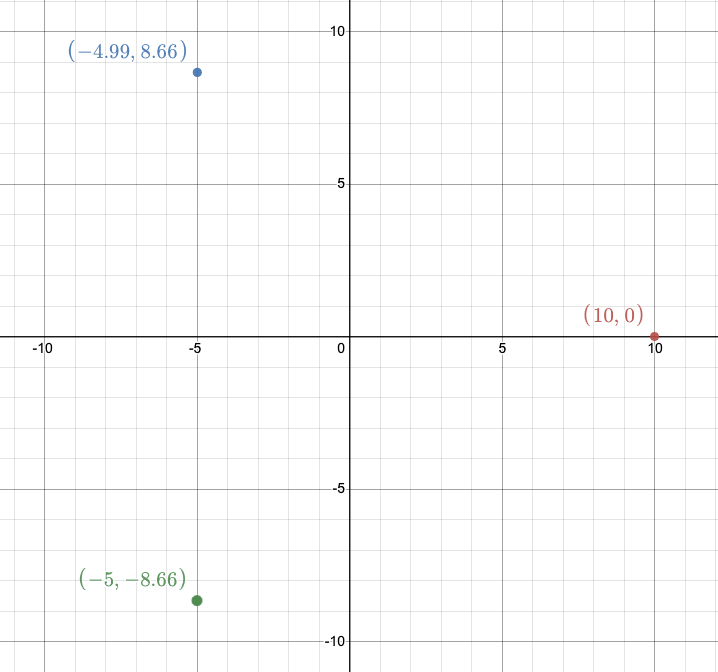
// 10 0
// -4.99 8.66
// -5.00 -8.66
위에서 구한 좌표값을 좌표 평면 위에 표시하면 아래와 같다. 세 점을 이으면 삼각형을 만들 수 있다.
다각형 그리기

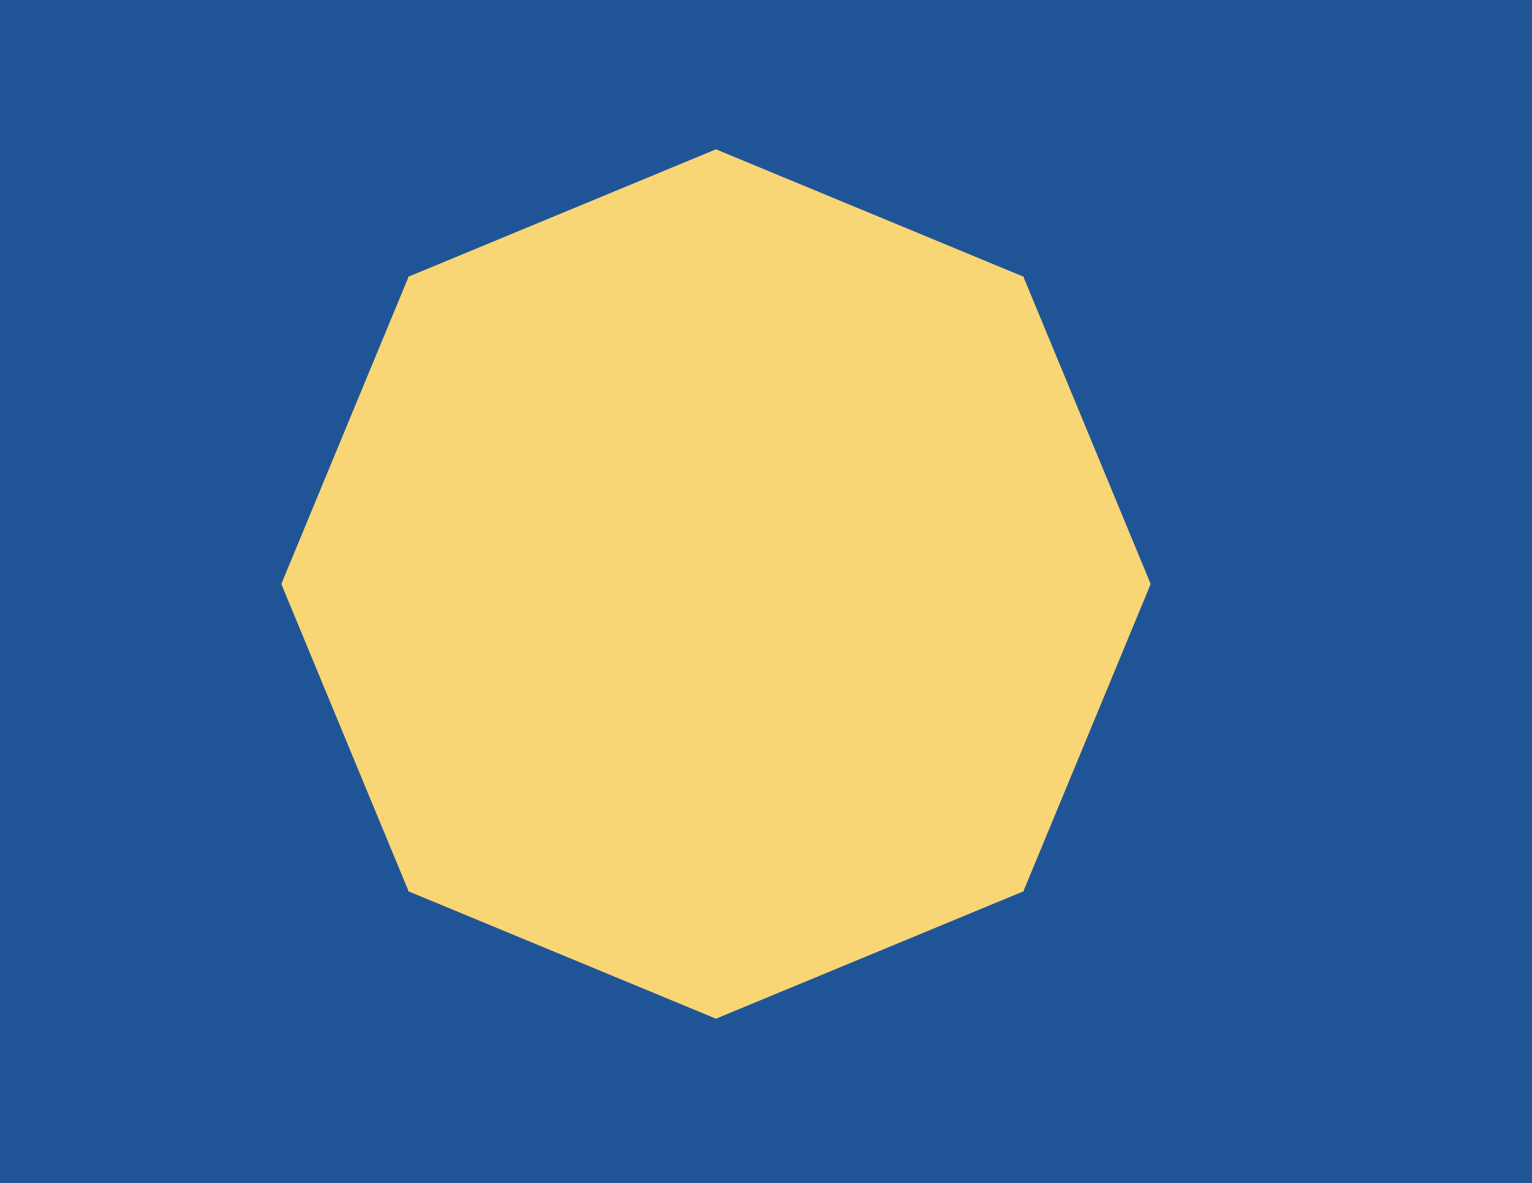
index.html
<!DOCTYPE html>
<html lang="en">
  <head>
    <meta charset="UTF-8" />
    <meta name="viewport" content="width=device-width, initial-scale=1.0" />
    <title>Document</title>
    <link rel="stylesheet" type="text/css" href="style.css" />
  </head>
  <body>
    <script type="module" src="app.js"></script>
  </body>
</html>
style.css
* {
  user-select: none;
  -ms-user-select: none;
  outline: 0;
  margin: 0;
  padding: 0;
  -webkit-tap-highlight-color: rgba(0, 0, 0, 0);
}

html {
  width: 100%;
  height: 100%;
}

body {
  width: 100%;
  height: 100%;
  overflow: hidden;
  background-color: #00539c;
}

canvas {
  width: 100%;
  height: 100%;
}
app.js
- canvas의 width, height에 무조건 2를 곱해서 레티나 디스플레이에서도 선명하게 만들어도 되지만, 지금은 devicePixelRatio 값을 구해서 canvas 사이즈를 결정하고 있다.
devicePixelRatio 값이 1보다 크다면 레티나 디스플레이 이므로 pixelRatio 값을 2로 설정
import { Polygon } from "./polygon.js";

class App {
  constructor() {
    this.canvas = document.createElement("canvas");
    document.body.appendChild(this.canvas);
    this.ctx = this.canvas.getContext("2d");

    this.pixelRatio = window.devicePixelRatio > 1 ? 2 : 1;

    window.addEventListener("resize", this.resize.bind(this), false);
    this.resize();

    window.requestAnimationFrame(this.animate.bind(this));
  }

  resize() {
    this.stageWidth = document.body.clientWidth;
    this.stageHeight = document.body.clientHeight;

    this.canvas.width = this.stageWidth * this.pixelRatio;
    this.canvas.height = this.stageHeight * this.pixelRatio;
    this.ctx.scale(this.pixelRatio, this.pixelRatio);

    this.polygon = new Polygon(
      this.stageWidth / 2,
      this.stageHeight / 2,
      this.stageHeight / 3,
      3 // 삼각형
    );
  }

  animate() {
    window.requestAnimationFrame(this.animate.bind(this));

    this.ctx.clearRect(0, 0, this.stageWidth, this.stageHeight);

    this.polygon.animate(this.ctx);
  }
}

window.onload = () => {
  new App();
};
polygon.js
- polygon을 만들 때 전달받는 x, y값은
stageWidth/2,stageHeight/2로 캔버스의 정중앙이다. ctx.translate(this.x, this.y);먼저 전달받은 x, y 값의 위치로 이동해 도형을 그릴 준비를 한다- 모든 꼭지점의 x, y 좌표값을 구한다. 맨 처음에 구한 좌표값으로는 선을 그리지 않고
moveTo()함수로 x, y 위치를 이동한다. 그 다음부터 구한 좌표값으로는lineTo()함수로 선을 그려준다. fill()을 이용해 색을 칠해준 뒤closePath()함수로 처음과 마지막의 선까지 이어서 그려주면 도형이 완성된다. - 하나의 context 영역에는 하나의 스타일만 가질 수 있다. 따라서 정해진 도형이나 반복해서 그리는 function의 경우 시작할 때
save()하고 끝날 때restore()해줌으로써 이전에 그렸던 스타일을 저장, 기억한 후 다시 context에 불러와 그릴 수 있게 해준다. save()메서드는 context의 properties를 저장한다.restore()메서드는 이전에 저장했던 상태로 되돌아가는 것이다.
const PI2 = Math.PI * 2;

export class Polygon {
  constructor(x, y, radius, sides) {
    this.x = x;
    this.y = y;
    this.radius = radius;
    this.sides = sides;
    this.rotate = 0;
  }

  animate(ctx) {
    ctx.save();
    ctx.fillStyle = "#FFD662";
    ctx.beginPath();

    const angle = PI2 / this.sides;

    ctx.translate(this.x, this.y);

    for (let i = 0; i < this.sides; i++) {
      const x = this.radius * Math.cos(angle * i);
      const y = this.radius * Math.sin(angle * i);

      i == 0 ? ctx.moveTo(x, y) : ctx.lineTo(x, y);
    }

    ctx.fill();
    ctx.closePath();
    ctx.restore();
  }
}
